Creating a one page html website product landing page is easier than most people think. People have hang-ups over graphics which can be overcome by using the right tools and reading some on line help pages.
For this project I am going to use my dcarter website design template. It’s possible to build your website from scratch using a KompoZer editor blank page and selection the scripts from the http://www.w3schools.com guide.
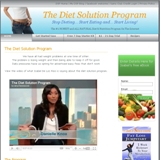
Click on the link to see the finished website: The Diet Solution Program
Also check out my previous post on how to start building a product landing page website.
However as previously mentioned the template provides style sheet files to allow you to easily manage common features and a look and feel with buttons and colour that would otherwise take more time to replicate.
After downloading and unzipping a template to a local folder the index.html, style.ccs and colour.ccs files can be opened in Visual Web Developer by picking on the file and using the mouse button open with command.
Click on the spit button in the bottom left of the window get split preview and source script display. Now you can pick the previewed features and the source script for the feature will be highlighted.

Creating a Header Image and Style Text:
The html script used to display the header picture and text is as follows.
<div id=”logo”><h1>TEMPLATE HEADING GOES HERE</h1></div>
Obviously there is something missing because for example you can’t see a header image.jpg file included in the script. However if we look for “logo” in the style and colour.ccs files we see the variables and parameters that we are looking for.


This shows one of the basic concepts of coding to create a function in one location and be able to call the function in multiple locations. We can change the header image in the colour.css file and have a new header image displayed on every website page.
You will notice that the logo header image height and width are defined in the style.ccs file.
My landing page is going to be wider and the header image higher. Therefore the template will have to be modified to suite this requirement.
I’m not going to go into the details of this in this blog. However, it’s fairly easy the look through the style sheet and decide what needs to be increased.
In my case the new image width will be 860px in line with my product vendor’s header image and I have increased the height to 147px.
The background image will also need to be widened. For my template I used the paint.net re size feature to increase the width by 101px.
Creating the Image:
For my header image I used MWSnap to make a copy of the vendor’s header image and used Gimp 2 to sample the image colours and to isolate the picture I needed to cut and paste into my new header.
I used a simple gradient colour for the background added text over the image.
Tip: The “h1” title text should include your product main category keyword and only displayed in the head and index page main titles. Multiple “h1” titles with different keywords will kill any chance of a good SEO ranking.
Open Gimp and create a new Image 860px wide by 147px high. Also open the image that you wish to copy items from. First use the colour picker to select the deepest region of the background colour.
Tip: Click on the Gimp Toolbox (blue & white) foreground & background tool for the Change Foreground Colour pop-up where you will find the html colour notation that can be used to modify colour.css theme colours.

The background image will be a blue gradient going to white at the top of the header. First ensure that the basic background colour is white and foreground colour is blue. Click the Toolbox Blend tool you will see the blend options below and gradient options in a Gimp window on your right.
Find the middle bottom of your header image with the mouse, then hold the left mouse button down and move mouse vertically up in a straight line to the top. Release the mouse button, save you image and you will have created the basic image background.

Use the Free Select tool to draw around the image you want to cut out then use the edit cut, paste and move options to place it into your new image.
Save the file and the header image is complete.
Gimp 2 is a very powerful tool, has fairly easy to understand help information and more complex image editing can be achieved using image layer options to cut, paste and blend images.
Copy the new image file into the style folder replacing the original colour.css #logo image with the new one.
Don’t forget to change the style.ccs logo dimensions!
For the header text I decided to us a quick and easy solution taking the style.css #logo h1 code and copying it with h2 and h3 versions below.
The style.css padding parameters, font sizes etc are then change to suite the new requirements.
Tip: Microsoft has a tool tips feature to help identify coding variable options with a curser and spacebar feature. For padding: click in front of the first “px” value and hit the space bar.
In the index.html file copy the <h1>TEMPLATE HEADING GOES HERE</h1> and paste in h2 and h3 versions in front of the </div>.
For convenience I saved the index file as index.htm and then opened it in the KompoZer editor where the header text can be modified using preview editor options to add the head text for the new site and select the font options.
The changes are then added into the html file as local <head> and logo style scripts.
New Landing Page Template Features:
Now you have a new template starting to look how you want it to look like the next step is to remove any features that you don’t want and to add the common items which will be in all the website pages.
The first step is to create a new folder with the name of the new website and copy over only the files and folders that you need for your new template.
Clean out most the default body text information that you don’t need. The main body area tends to be column 2, the right being column. The right will be used for a submission form, banners and a link or two.
Remember you can always go back to your downloaded template to add back scripts at a later date.
Since you have done a sketch of you basic layout you already know what menu and vendor link pages you want for your site.
The menu link text and header/footer link text will be similar for all pages and so this information should be added into your index.htm page.
Once you have the common features added you can save the index file with the names of the pages that your site is going to use.
My website menu scripts are shown as follows:
<div id=”content”>
<div id=”menu”>
<ul>
<li><a class=”last” href=”http://bit.ly/lbo5TC”>Recipes</a></li>
<li><a href=”http://bit.ly/mBZ9aN”>$1 – 21 Day Trial</a></li>
<li><a href=”http://bit.ly/ir3HeJ”>Free 7 Day Starter Kit</a></li>
<li><a href=”http://bit.ly/jZ0hMe”>Get Started Now</a></li>
<li><a id=”selected” href=”index.htm”>HOME</a></li>
</ul>
</div>
The id=”selected” is moved to the appropriate menu button for each template html template page.
The scripts used for my web pages can viewed by clicking on the webpage body and selection the view page source option.
For places where you want to open pages in new tabs use the following
< ![endif]–>target=”_blank” script.
Ex:
<a target=”_blank” href=”http://on.fb.me/lTH7eU”>facebook welcome</a>
If you are uncomfortable with the scripting this can be added using the KompoZer with the visual preview editor.
Just a reminder again that the MS VWD editor split view feature allows for the highlighting of scripts for features that are selected in the preview window.
Adding Web Page Content:
Only have <h1> main title per body page. The landing page <h1> must use the product category keyword. Paragraph text is added between <p></p> and line spaces added with <br />. Again a lot of the content can be aded with a visual editor.
Note: That <br /> W2C compliant the KompoZer editor removes the “/”
I have added a video and body text within a table for the main page column 2 content.
Video script:
<div style=”margin: 0pt; padding: 10pt 0px 20pt 25px; width: 480px; height: 400px; text-align: center;“>
<object height=”390″ width=”477″> <param name=”movie” value=”http://www.youtube-nocookie.com/v/MIn6lVr_TK4?version=3&hl=en_US&rel=0″><param name=”allowFullScreen” value=”true”> <param name=”allowscriptaccess” value=”always”>
<embed src=”http://www.youtube-nocookie.com/v/MIn6lVr_TK4?autoplay=1;version=3&hl=en_US&rel=0″ type=”application/x-shockwave-flash” allowscriptaccess=”always” allowfullscreen=”true” height=”390″ width=”477″></object><br>
</div>
Table Script:
<table style=”text-align: left; width: 100%;“ border=”0″ cellpadding=”2″ cellspacing=”2″>
<tbody>
<tr>
<td align=”center” valign=”left”><img style=”width: 23px; height: 20px;“ alt=”The Diet Solution Program” src=”http://love-food-lose-weight.com/wp-content/uploads/2011/03/checkmark.jpg”></td>
<td style=”text-align: left; vertical-align: middle;“>
A “metabolic type” diet plan</td>
</tr>
<tr>
<td align=”center” valign=”left”><img style=”width: 23px; height: 20px;“ alt=”The Diet Solution Program” src=”http://love-food-lose-weight.com/wp-content/uploads/2011/03/checkmark.jpg”></td>
<td style=”vertical-align: middle; text-align: left;“>
Keeping to your ideal daily calorie consumption</td>
</tr>
<tr>
<td align=”center” valign=”middle”><img style=”width: 23px; height: 20px;“ alt=”The Diet Solution Program” src=”http://love-food-lose-weight.com/wp-content/uploads/2011/03/checkmark.jpg”></td>
<td style=”vertical-align: middle; text-align: left;“>
Rotational consumption of the high quality foods </td>
</tr>
</tbody>
</table>
For Column 2:
The form and banner scripts are as follows.
<div id=”column1″>
<div class=”sidebaritem”><!– **** INSERT NEWS ITEMS HERE **** –>
<p></p>
<p>
<script type=”text/javascript” src=”http://forms.aweber.com/form/61/706145661.js”></script></p>
</div>
<div class=”sidebaritem”>
<center><img src=”http://love-food-lose-weight.com/wp-content/uploads/2011/05/1WeekKickStartPhoto-01.jpg”></a></center>
</div>
<div class=”sidebaritem”>
<h3>Sams Club Credit link</h3>
<ul>
<li><a target=”_blank” href=”https://www.onlinecreditcenter6.com/
commonredirect/sams/commonlogin.html#”>Sams Club Credit Login</a></li>
</ul>
</div>
</div>
Be careful with the <div></div> pairs because they are nested and if one </div> is missing it will mess up the page content placements. Do saves before and after making the changes.
Final Words:
This blog has covered off the major areas for creating a high quality html scripted website. Not everything can be covered in detail. However what has been provided are the tools and basic methods to be able to understand how to find and add the features needed to create a high quality website.
The next blog will cover the finishing parts of the website scripting and verification process. Publishing, SEO configuration and Google search engine indexing.
A sample of addition SEO scripting as follows:
My <head> section <meta> keyword optimization.
<meta name=”description” content=”The Diet Solution Program – A Canadian Affiliate Providing Easy Access to the The #1 online HONEST,ALL NATURAL Diet Nutrition Program”>
<meta name=”keywords” content=”the diet solution, the diet solution program, Isabel De Los Rios, sams club credit, How to lose weight in a week, Weight loss tips, How to Reduce Weight”>
Summary:
All the component parts can be accessed to create your own html landing page using free tools and templates. My example landing page can be accessed on the web, the html template is available, coding examples and most of the process is included within this blog.
A slightly different way you can now use this learning to create a product landing site is with my Satellite Direct product. This time around making use of the affiliate landing page graphics its possible to create a look alike site.
Check it out at: My PC Satellite TV
Subscribe to my blog to forward any questions that you may have and I will do my best to get back to you with individual answers.
Good luck!
Home Website Builder


![[Valid RSS]](http://mark-jago.com/wp-content/uploads/2011/11/Validrss.gif "Validate my RSS feed")